G
Graeme Harvey
Guest
How to make “Multiples” shots.
I do not have Photoshop or Paint Shop Pro, but I use Serif Pageplus v8. The techniques will be the same, but you may need to ask someone else what the respective tools are called in other programs.
Anyway, I digress.
Having thought about how you want to appear in the picture, the first thing to do is take the initial photographs. To illustrate this, I'm using the “It's all done with mirrors” piece, which is a fairly simple way to start.
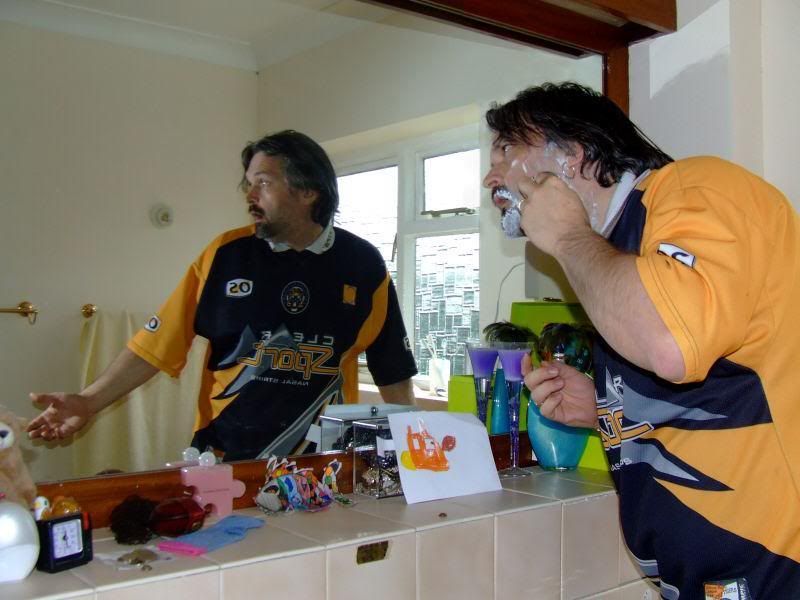
What we're aiming for:
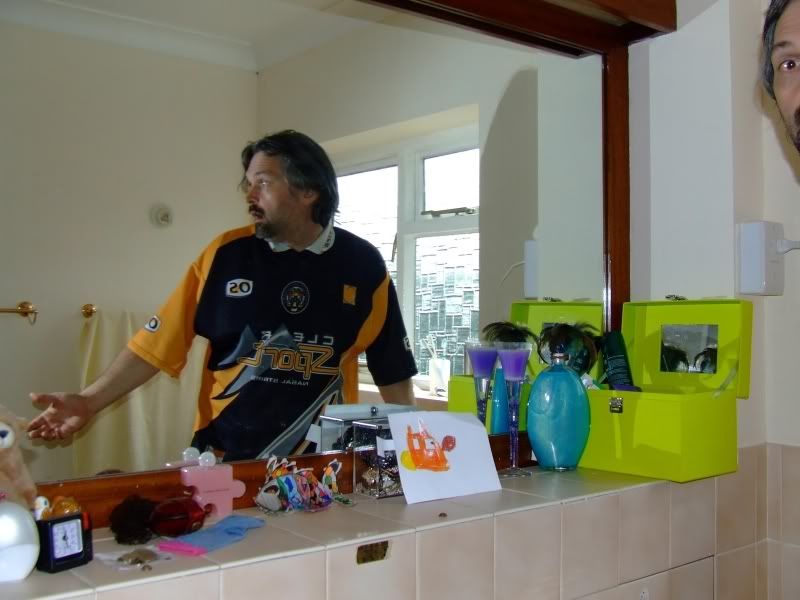
The actual photographs which make up the picture were these:
Shot 1:
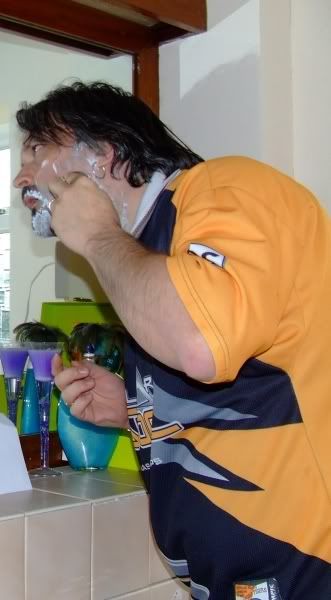
Shot 2:
Set up the camera on a tripod, and using the 10 second shutter delay, take each of the pictures. Try to make sure that the camera and the surrounding artefacts don't move during the shoot so that you've less tinkering to do in the post-processing. Once uploaded onto your computer, open them in your editing package.
I used Shot 1 as a background layer, and merely pasted a selected portion from Shot 2 over it. Here's how.
Using the Rectangular Select tool, I selected the portion of Shot 2 shown below. I then copied it, and moving to Shot 1, pasted it using “Paste as new Layer” from the Edit menu. I re-named the layer Mr Right.
Mr Right
Then, using the “Move” tool, I positioned the new layer in the correct place over the background layer.
Because of the slight difference in lighting and shadows between the two original photos, there was a slight colour mismatch above Mr. Right's head, but this can be dealt with shortly.
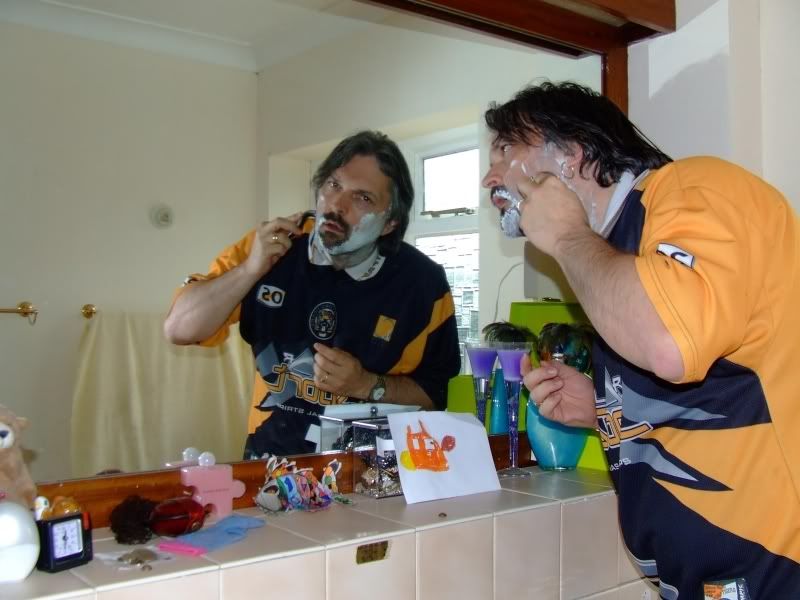
The new picture is now basically done, but needs a few little tweaks. The picture so far:
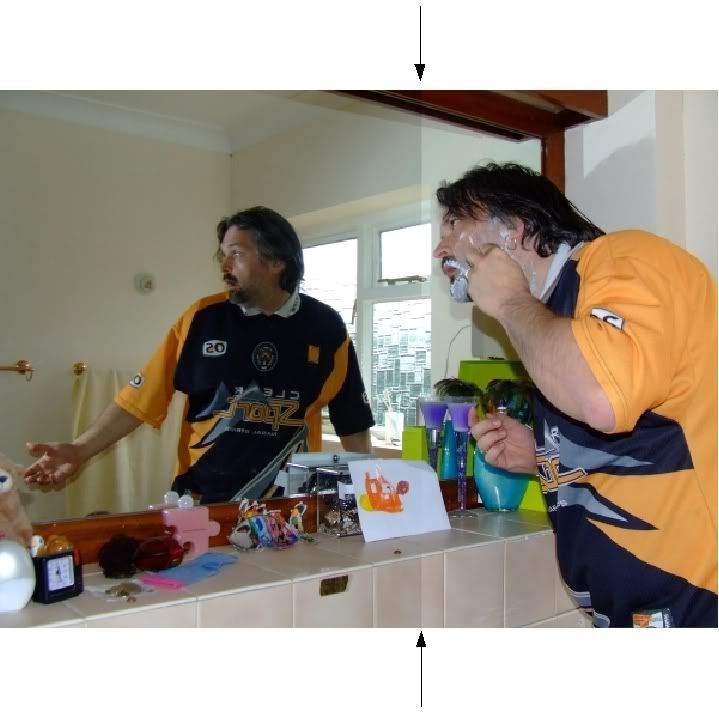
There is a very visible joint where the lighting is slightly different in the two photos, highlighted by the arrows on the above picture. To combat this, I used the Background Erase tool on the Mr Right Layer. I selected a feathered edge for the eraser, and then erased the edge quite roughly as I would with a rubber on a pencil drawing. This hid any obvious colour differences. I now got to this:

Doing the erasing caused my original shadow to creep though in the problem area shown above. To combat this, I airbrushed the rest of the area using a colour from the “Colour to select” area.
So, I selected the Background layer, then chose the “Colour Pickup Tool.” I clicked in the “Colour to select” area and this set the foreground colour to the one I wanted. I went on to select the Mr Right Layer and then the “Airbrush Tool” again with a feathered edge. Using short clicks, I gently recoloured the offending area. A quick click in “Undo” put right any stray airbrush painting. I was then left with the final product below:
I do not have Photoshop or Paint Shop Pro, but I use Serif Pageplus v8. The techniques will be the same, but you may need to ask someone else what the respective tools are called in other programs.
Anyway, I digress.
Having thought about how you want to appear in the picture, the first thing to do is take the initial photographs. To illustrate this, I'm using the “It's all done with mirrors” piece, which is a fairly simple way to start.
What we're aiming for:
The actual photographs which make up the picture were these:
Shot 1:
Shot 2:
Set up the camera on a tripod, and using the 10 second shutter delay, take each of the pictures. Try to make sure that the camera and the surrounding artefacts don't move during the shoot so that you've less tinkering to do in the post-processing. Once uploaded onto your computer, open them in your editing package.
I used Shot 1 as a background layer, and merely pasted a selected portion from Shot 2 over it. Here's how.
Using the Rectangular Select tool, I selected the portion of Shot 2 shown below. I then copied it, and moving to Shot 1, pasted it using “Paste as new Layer” from the Edit menu. I re-named the layer Mr Right.
Mr Right
Then, using the “Move” tool, I positioned the new layer in the correct place over the background layer.
Because of the slight difference in lighting and shadows between the two original photos, there was a slight colour mismatch above Mr. Right's head, but this can be dealt with shortly.
The new picture is now basically done, but needs a few little tweaks. The picture so far:
There is a very visible joint where the lighting is slightly different in the two photos, highlighted by the arrows on the above picture. To combat this, I used the Background Erase tool on the Mr Right Layer. I selected a feathered edge for the eraser, and then erased the edge quite roughly as I would with a rubber on a pencil drawing. This hid any obvious colour differences. I now got to this:
Doing the erasing caused my original shadow to creep though in the problem area shown above. To combat this, I airbrushed the rest of the area using a colour from the “Colour to select” area.
So, I selected the Background layer, then chose the “Colour Pickup Tool.” I clicked in the “Colour to select” area and this set the foreground colour to the one I wanted. I went on to select the Mr Right Layer and then the “Airbrush Tool” again with a feathered edge. Using short clicks, I gently recoloured the offending area. A quick click in “Undo” put right any stray airbrush painting. I was then left with the final product below:
")