From camera to print

Joan West

Trade Member: Photo Imaging North Wales
To start this off I thought I would begin with how I have things set up on my computer,
others may have different settings this is purely the way that I work.
First off here's how my colour settings are set up.

PINWcoloursettings.jpg


Second, here's my workspace. As I am right handed I keep everything to the right side of my screen (works for me)

WorkspaceA1.jpg
 
interesting start ...

so whats the score with the 2 different colour settings then ... just for coping with different input ....
i shoot in adobe, edit in adobe, and print in adobe ... would you recommend that?
 
Well, if you only take pics in RAW it really doesn't matter as you can set your preferred colour
space in Camera Raw it just helps if all your colour spaces are set to the same (although if you
tend to go backwards and forwards between Photoshop & Lightroom it is said that ProPhoto RGB
is better but that's another story!)

If you take pics in TIFF & Jpeg and printing via inkjet I would use Adobe RGB 1998
and if you also want to print via a lab or use them for the web convert copies to SRGB.
You can do this easily with Image Processor which you can find in all Photoshops since CS
Edit - Scripts - Image Processor.

I use Adobe RGB 1998 for prints via our Epson 7880 and SRGB for prints via our Fuji Frontier and web stuff.
As we get a mishmash of files coming in it is easier for me if I use the colour settings as posted.
 
OK, before we get to the guts of the thread there's still a bit more set up to do, there will be a few of these so I will put them up a few at a time.

1: MONITOR CALIBRATION, yes you should do this, I use a Spyder but you pays your money and takes your choice.

2: ACCURATE EYEDROPPER COLOUR CORRECTIONS
By default this is set to point sample, changing this to 3 x3 average will give you a better reading from the area you click in

PointSampleA1-1.jpg
 
SETTING UP STANDARD CROP SIZES
You can set up your frequently used crop sizes so that they are available at the click of a button.
Select the crop tool

CroppingA.jpg


Then in the options bar at the top of your screen put in the size of print (add in/cm/mm or whatever you use after the size) that you want to crop to, also the resolution, I use 300ppi.

CroppingB.jpg


Then click on the down triangle as shown.

CroppingC.jpg


This brings up the new tool preset box

CroppingD.jpg


Click and it will show you the size of the crop, click OK and it will save that crop, repeat to set up your other sizes

CroppingE.jpg
 
Joan - great point about using the Spyder - can't stress this enough IMHO, as without a calibrated monitor you're basically just guessing what colour everything is, and how bright/dark.

Regarding resolution - is 300 dpi a safe bet for most commercial print machines?
 
This is great stuff Joan! Thankyou for putting the effort in ... I'll make a nice article out of it all when your done!
 
Preparing Files for Print via a photo lab.
For this I am assuming that you are working in Photoshop and have opened your pic, carried out all of your photo editing and saved the resulting file as your master image file to allow you to go back at any point to tweak if required.

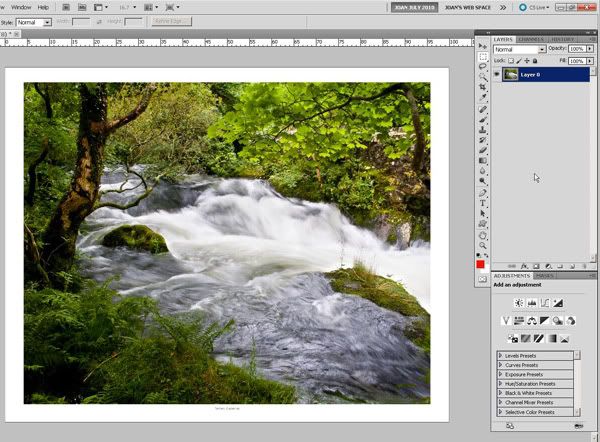
So, here you are with your layered master file and you want to have a selection of print sizes made at a local photo lab.

1. Flatten your file and save it via "save as" choose Tiff format and give that flattened file a different name to the original (I would suggest making separate folders, one for master files and one for print work)

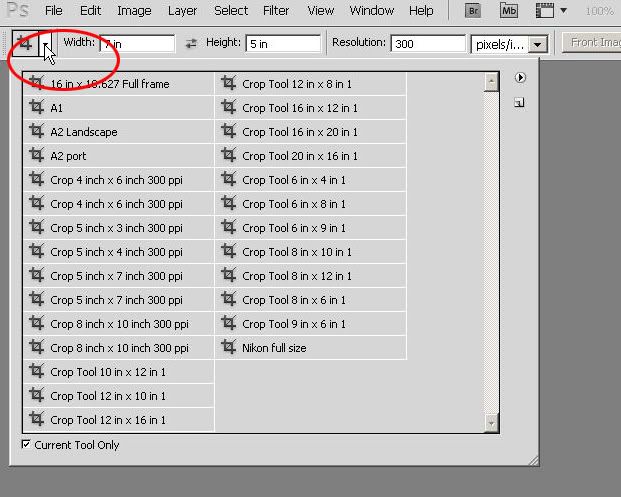
2. Labs print at standard photo sizes so you will need to crop your file to a print size, here are the standard print sizes that we produce, on Fuji Crystal Archive paper, in inches: 6x4, 5x5, 7x5, 7.5x5, 8x6, 8x8, 9x6,10x8, 10x10, 12x8, 12x10 and 15x10.

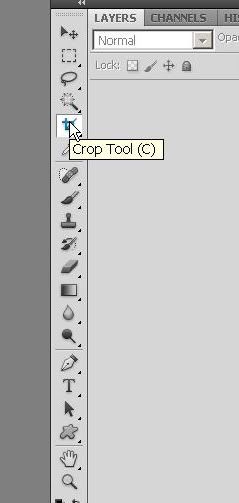
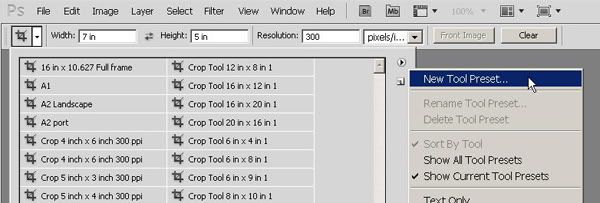
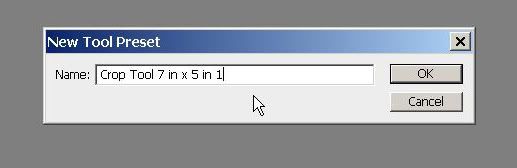
3. Now you need to crop your flattened file to a print size, see previous screengrabs if you are unsure of how to crop.
In the options bar at the top put in the required crop, say, 6x4 and add ins after the figures and Photoshop knows that you want inches and 300 ppi in the resolution box drag the crop tool over your pic to select the area required, it will give you an exact 6x4 crop (this is easier than it sounds)

RPFCropD.jpg


4. Save your cropped file as a jpeg, 10 or above quality, add the size to the file name (makes life easier) then save it to your print folder.

5. If your files are Adobe RGB you will need to convert them to SRGB, Edit - convert to profile - choose SRGB or you could convert a folderful via the image processor File - scripts - image processor, SRGB is the working space for our Fuji Frontier and will give you the best results.

6. All files should be supplied as RGB files even for black & white pics so if you have converted to greyscale (eek, that's a no no) convert to RGB via Image - mode - RGB Colour also while you are there ensure that the file is 8bit and not 16bit as, as yet, photo labs cannot print 16bit (also you really only need to process files in 16bit if you are doing extreme editing in my opinion ;)

I hope all of this makes sense and is of some use, I also have a piece about print preparation for large format prints and master file preparation in the pipeline.

Joan
 
Joan - I think this is going to save people a whole lot of time, and get them to the results they're expecting comparing screen to print.

So for all the 16 bit capabilities of our software, we're basically wasting our time when going to print!
 
Hi Chris,
I would say that 16 bit would be your choice if you have to do a mammoth amount of editing of a file to get a decent end result, so staying in 16 bit from start to finish would be OK for that and then converting to 8 bit for print.
The upshot of this for me is that if I have to do gazillions of edits and adjustments to make my original file half decent I would, if possible, retake the pic, good stuff in, good stuff out... it's horses for courses and the 8 bit versus 16 bit debate has rumbled on for a few years now :) and will probably continue....until the next big digital thingy. So, no it's not a waste of time as you still have your original files as 16 bit to do with what you will. Happy Days

Joan
 
Back
Top