Pete Askew
Admin
Someone elsewhere asked how this was done so I thought it might be a good opportunity to create a walk-through.
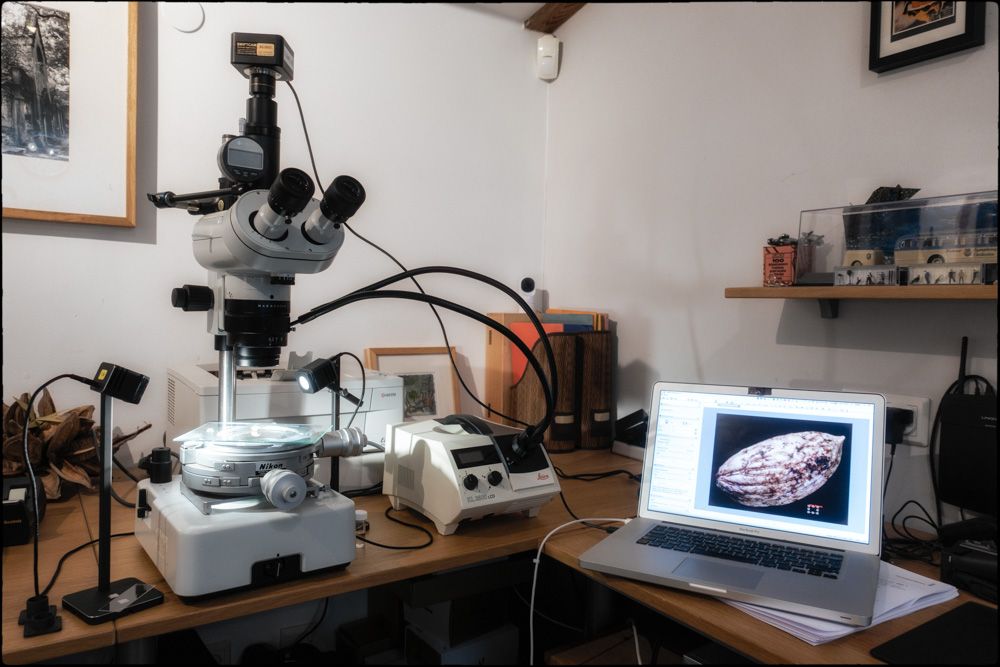
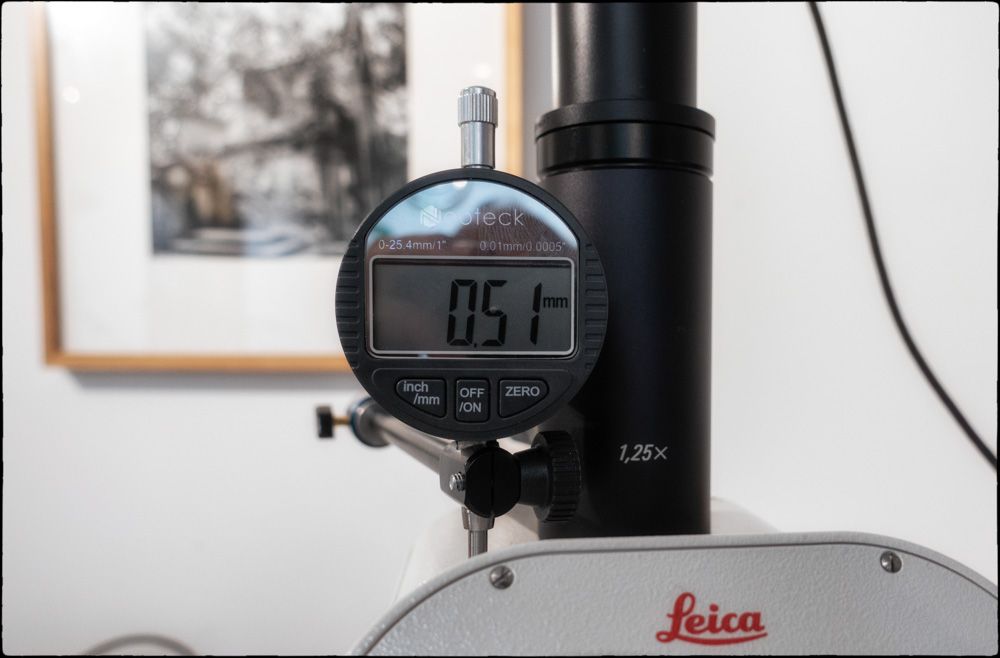
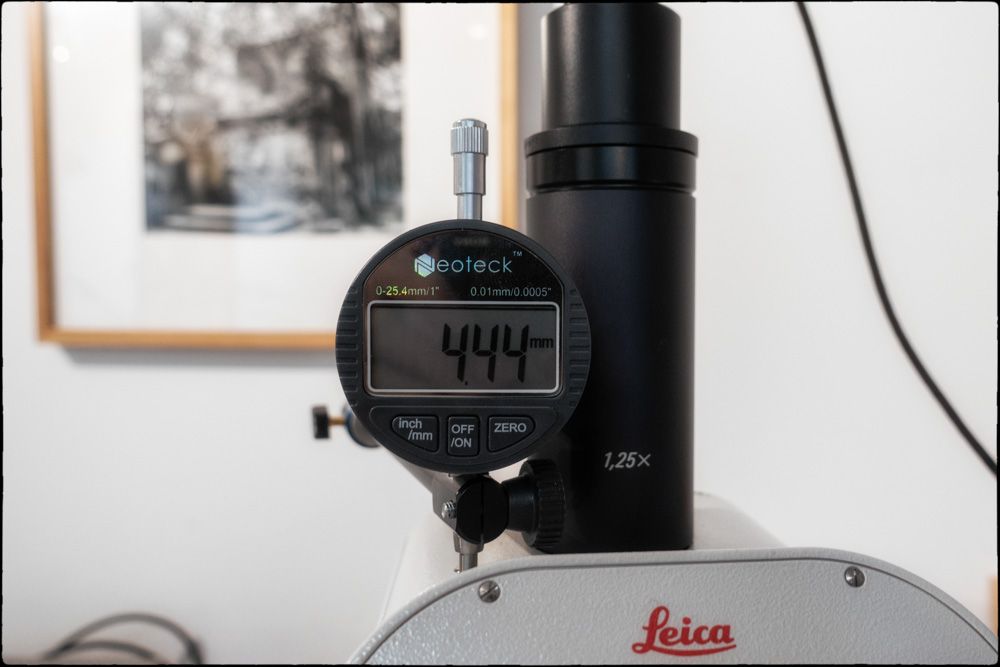
The image below shows the setup. On the Nikon stage attached to the Leica M420 is sitting a small tropical seed about 10 mm in length and 5 mm in width. It is lit with 2 Relio 4000 K spots fitted with polarisers and running at 80% of their output to give good contrast and reveal the surface texture of the seed. The camera at this point is focussed at the lowest point visible on the seed (effectively the edge at the widest point) and I had attached a digital depth indicator to the focussing column to aid making images in regular steps (0.5 mm) from the lowest to highest (top of the seed) point of focus (a distance of 4.4 mm). The camera is tethered by a USB connection to the laptop which is controlling it through Swift Imaging 3.0. The exposure is fixed (at 346 ms, ie about 1/3 s) and I have adjusted the colour temperature to as close to 4000 K as I could (you cannot just enter a value, which is annoying) and adjusted the tint to match the colour of the specimen (I must run some colour calibrations to take the guess-work out).
A series of images was then captured after changing the point of focus between each by raising the microscope head using the focus control in 0. 5 mm increments.

Until the upper surface of the seed was in focus.
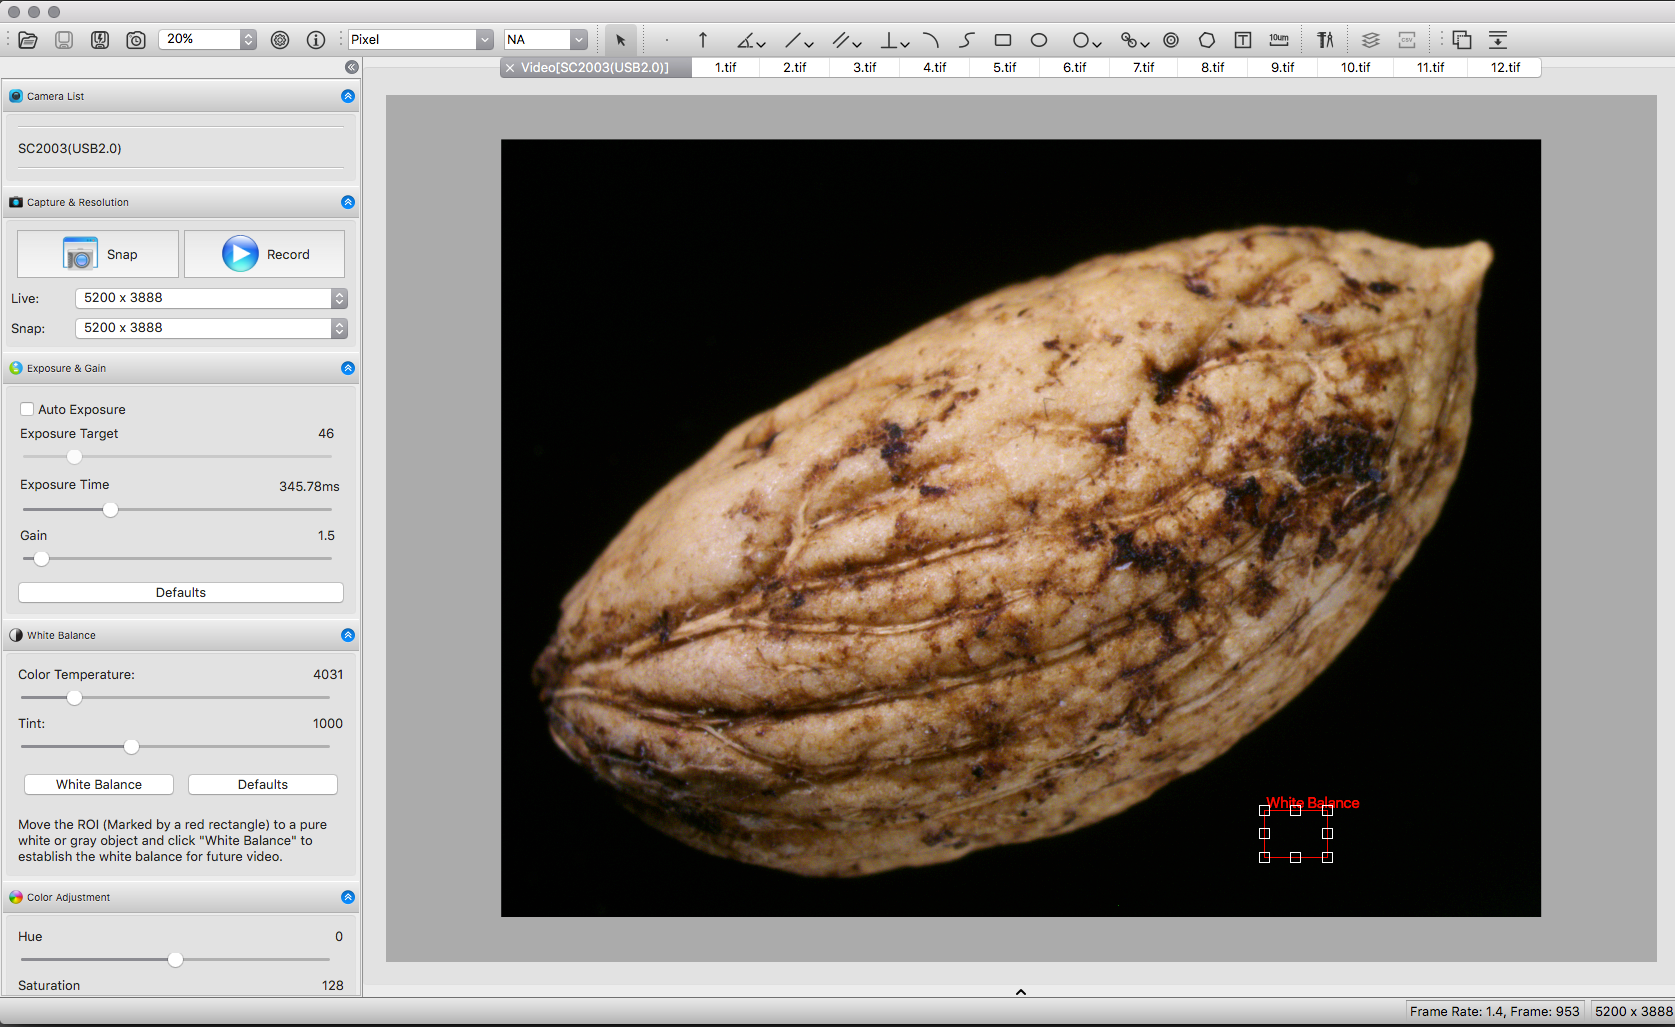
So a total of 12 images were captured using the same framing, exposure and colour temperature settings, but at different points of focus. This is a screenshot of Swift Imaging 3.0 showing the settings at the final (upper) point of focus.
 .
.
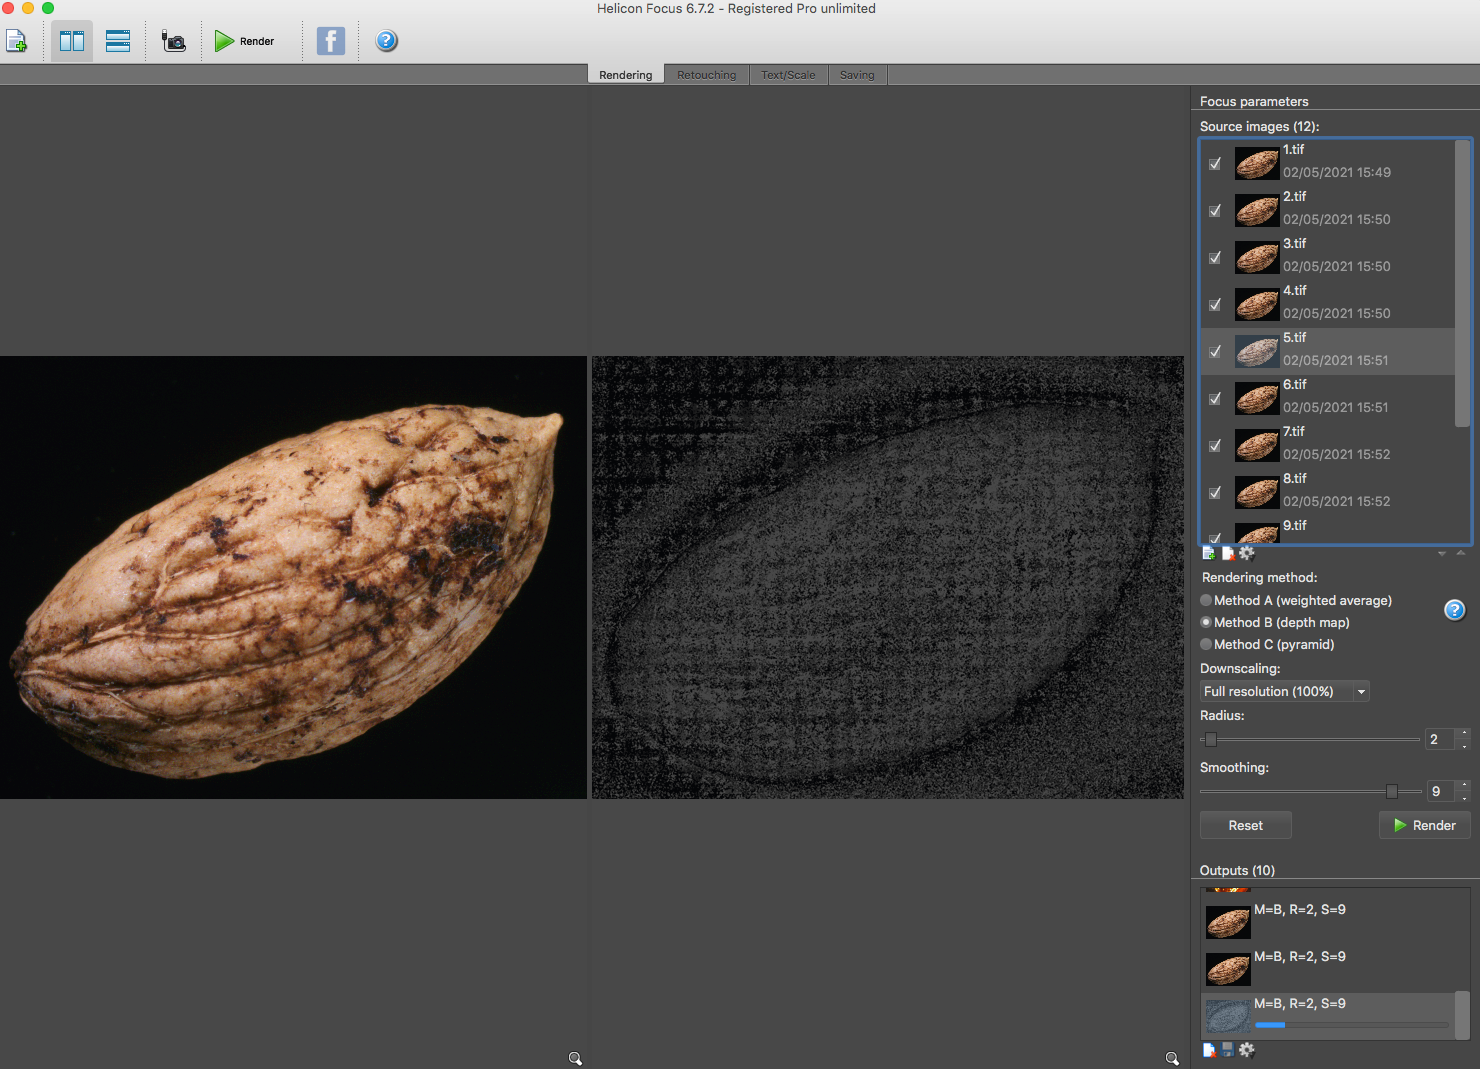
The images were then saved in sequence order as TIF files. These files were then opened in focus stacking software, in this instance Helicon Focus. Having loaded them and chosen the method to use for the focus stack it is usually just a simple matter of pressing render. The software will run through the images one at a time and display each layer on the left-hand panel and display the mapping process being used on the right-hand panel (this will vary depending of which algorithm has been chosen: in this case 'Depth Map'). This shows it mid process with the images of the seed:
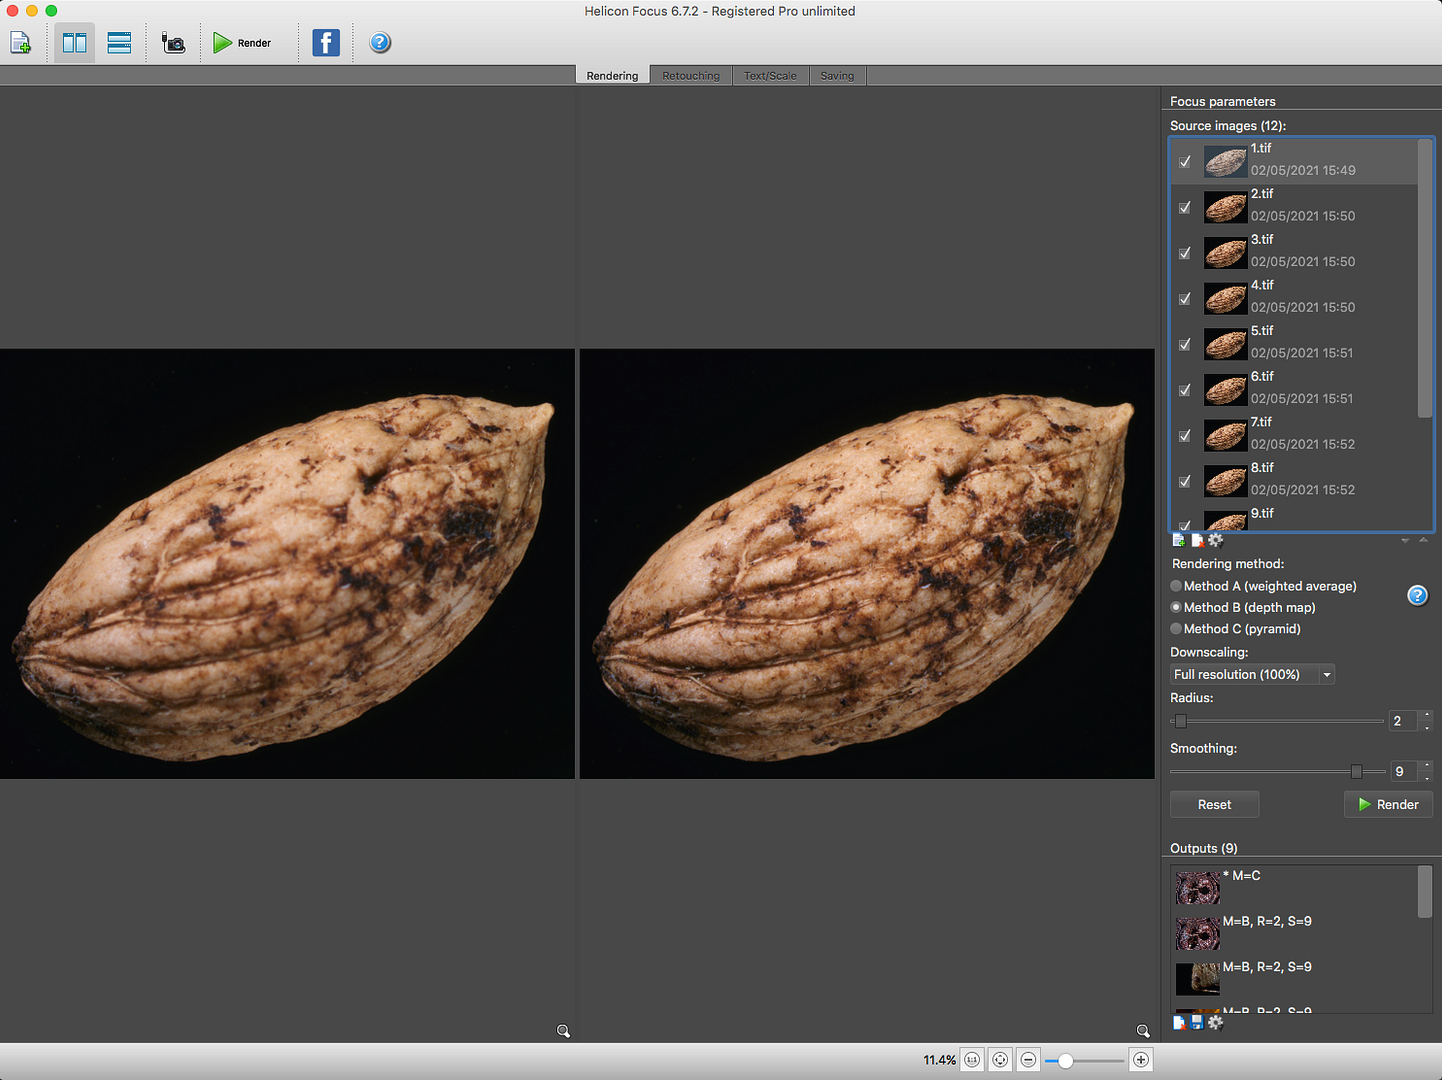
And when the process is complete it will display the composite focus stack in the right-hand panel and the last layer processed in the left-hand panel.
You can then save the rendered image (or make changes to the rendering process, edit the layers etc) and import it into your chosen image editor (assuming you want to fine-tune it). Here I loaded both the individual focus layers and the final rendered image into Adobe Lightroom and made some basic adjustments.

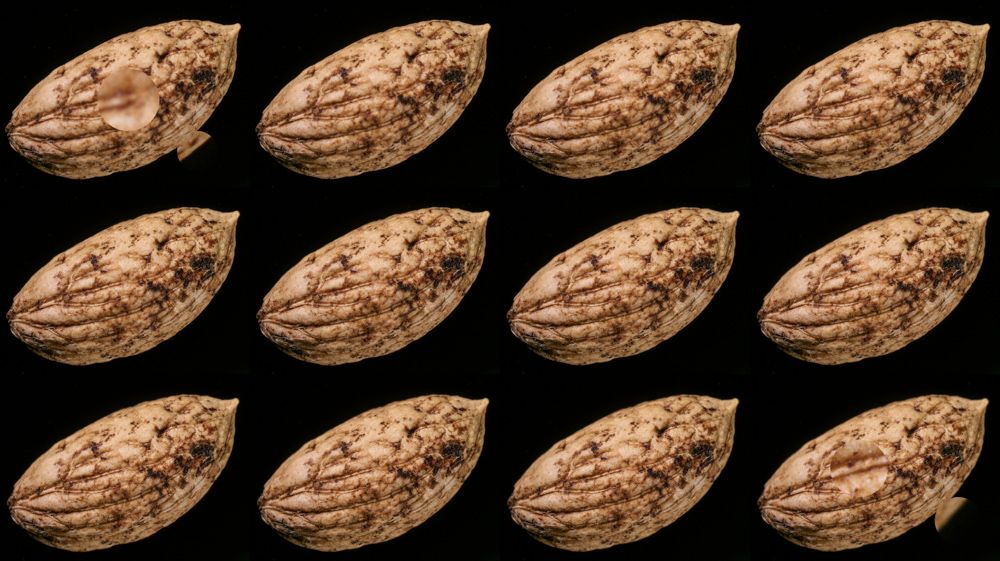
I used the individual layers to produce a composite image showing each layer in sequence from lowest point of focus (top left) to highest point of focus (bottom right) and added a couple of zoomed areas to show the difference in focus that is present.
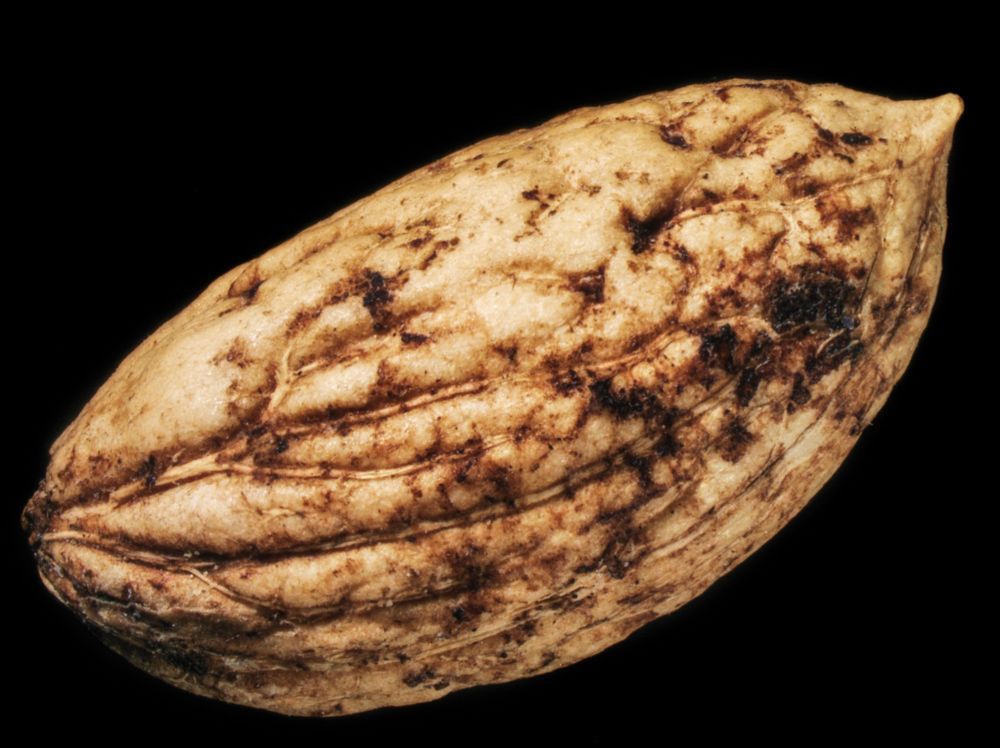
I then processed the final rendered image through Nik ColorEFEX Pro 4 to 'improve' the aesthetics, used a layering process in Adobe Photoshop to eliminate a couple of coloured artefacts in the black background and then created a final image for export using Nik Output Sharpener.
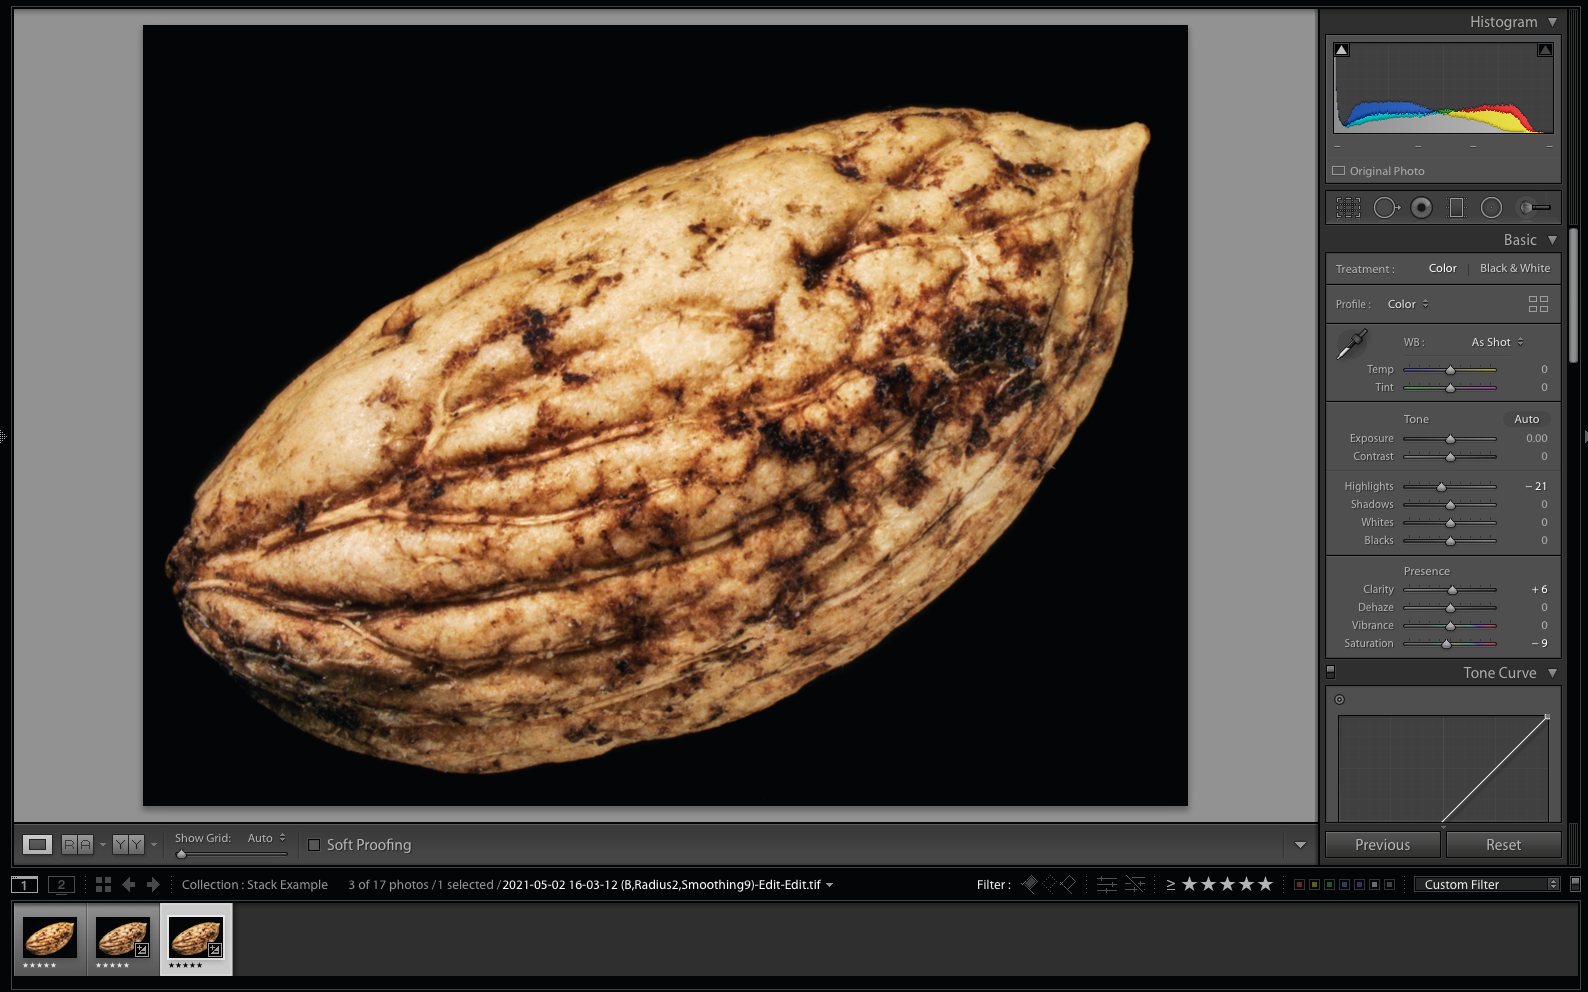
And this is the final image.
The image below shows the setup. On the Nikon stage attached to the Leica M420 is sitting a small tropical seed about 10 mm in length and 5 mm in width. It is lit with 2 Relio 4000 K spots fitted with polarisers and running at 80% of their output to give good contrast and reveal the surface texture of the seed. The camera at this point is focussed at the lowest point visible on the seed (effectively the edge at the widest point) and I had attached a digital depth indicator to the focussing column to aid making images in regular steps (0.5 mm) from the lowest to highest (top of the seed) point of focus (a distance of 4.4 mm). The camera is tethered by a USB connection to the laptop which is controlling it through Swift Imaging 3.0. The exposure is fixed (at 346 ms, ie about 1/3 s) and I have adjusted the colour temperature to as close to 4000 K as I could (you cannot just enter a value, which is annoying) and adjusted the tint to match the colour of the specimen (I must run some colour calibrations to take the guess-work out).
A series of images was then captured after changing the point of focus between each by raising the microscope head using the focus control in 0. 5 mm increments.
Until the upper surface of the seed was in focus.
So a total of 12 images were captured using the same framing, exposure and colour temperature settings, but at different points of focus. This is a screenshot of Swift Imaging 3.0 showing the settings at the final (upper) point of focus.
The images were then saved in sequence order as TIF files. These files were then opened in focus stacking software, in this instance Helicon Focus. Having loaded them and chosen the method to use for the focus stack it is usually just a simple matter of pressing render. The software will run through the images one at a time and display each layer on the left-hand panel and display the mapping process being used on the right-hand panel (this will vary depending of which algorithm has been chosen: in this case 'Depth Map'). This shows it mid process with the images of the seed:
And when the process is complete it will display the composite focus stack in the right-hand panel and the last layer processed in the left-hand panel.
You can then save the rendered image (or make changes to the rendering process, edit the layers etc) and import it into your chosen image editor (assuming you want to fine-tune it). Here I loaded both the individual focus layers and the final rendered image into Adobe Lightroom and made some basic adjustments.
I used the individual layers to produce a composite image showing each layer in sequence from lowest point of focus (top left) to highest point of focus (bottom right) and added a couple of zoomed areas to show the difference in focus that is present.
I then processed the final rendered image through Nik ColorEFEX Pro 4 to 'improve' the aesthetics, used a layering process in Adobe Photoshop to eliminate a couple of coloured artefacts in the black background and then created a final image for export using Nik Output Sharpener.
And this is the final image.
")
")