Sharpening Methods

Paul Lange

Moderator
I thought it might be interesting to talk about peoples preferred methods of sharpening. as well as methods of converting images to Jpegs for web viewing.

Recently I have started to initially sharpen LR and then export to PS where I use a variation of high pass sharpening.

1) I duplicate the layer and then flick trough the colour channels to see which one has the best edge definition.

2) I then use the find edges filter and then colour range where I select a white area and adjust the fuzziness slider to suit.

3) I then inverse the selection and then go back to Layers and delete the duplicate.

4) Then I duplicate the layer again but as there is a selection only the selection gets duplicated in the new layer.

5) The layer is then set so overlay or softlight blend mode.

6) High pass filtering is then selected the radius selected to suit.

7) The layer opacity is then tweaked and if required a mask is used to paint out over sharpened areas.

I'd be interested to see what other people do.

 
I usually apply about 60% in LR to images from a DSLR but no more than 25% from either the M9 or the PhaseOne backs at the 'input' stage. After editing (often in PS) I use Nik Sharpener 3 for the output using either 50% Adaptive for D3 etc and 40% for M9 / PhaseOne.
 
I press sharpen in CS5........LOL

Daz
 
I'm not too far from you Darren. Having read something years ago about not doing capture sharpening in RAW, I took that to mean not to capture sharpen at all. Only recently did I realise it meant PS was better at the job. My eyesight is appalling and I can't manage those sliders to save my life - Ron knows the technical bit, but I have stereoblindness. Just after getting CS5 I invested in the Photokit sharpener. I use it for capture sharpening and very rarely for creative sharpening, but literally a couple of times on birds. For the web, I resize and use Topaz Infocus. I used to use FocalBlade and I would still trust that for printing, but I'm slowly learning to use some sliders and so far nobody has complained about soft or oversharpened images. I can see the extremes at either end, but the middle is pretty meaningless to be honest :)
 
I used to love super sharp photos but i try not to use it that often these days, and defo dont need it when using my 24-70 F2.8 its sharp enough.

Daz
 
between LR4 and the plentiful quality plug-ins for PS I've become lazy and no longer brush my sharpness in but rather just click and drag sliders instead
 
I tend to sharpen at RAW conversion using ACR - amount and radius varies by camera model

If I'm sharpening further in Photoshop I first convert into LAB Space

I then sharpen just the L (Lightness) channel with Unsharp Mask - this sharpens without halos or color ghosting effects.

I then re-combine channels into sRGB for the final image.
 
A combo of methods depending on image for me but often like Chris I convert to LAB then unsharp mask on the Lightness channel Ctrl+1 (PC) then back to RGB,
 
When I process the RAW file I reduce noise and sharpen then open in PS do what ever messing about I'm doing, reduce size for web then sharpen again if needed before saving.
 
It depends on the situation, so I use one of the following methods:
0. Simple resize to 900x600 pix without any sharpening.
1. Resize image to 900x600 pix. LAB - Unsharp Mask (Amount 75, Radius 0,8, Threshold 0)
2. Resize image to 50%, duplicate layer, go to Channels, chose Red channel, go to Filter -> Sharpen -> Sharpen. Chose Green channel go to Filter -> Sharpen -> Sharpen. Then mark RGB and reduce layer transparency to 70%.
Resize image to 900x600 pix and repeat sharpening in Red and Green channels as it is described above, but now reduce layer transparency to 40%.
3. Resize image to 900x600 pix. Use action written by russian photographer "Smooth Sharper v.1" It can be downloaded from my Dropbox here.
4. Resize image to 900x600 pix. Duplicate layer, go to Image -> Apply Image and in window chose Green Channel (Layer - Merged, Blending - Multiply). Go to Filter -> Other -> High Pass -> Radius 1,3 (never use more than 2). Change layer to Soft Light (sometimes to Overlay). Merge layers.

When I'm processing reportage photos, I use method #2. For this purposes I made an Action. When I'm processing portraits for web-portfolio or for any social network, like Facebook, I use method #3 or #4.
So, you may see, that the difference between sharped images is not so critical, much more depends on the values and figures when you sharp the image.
 

Attachments

  • sharp_0_no sharp.jpg
    sharp_0_no sharp.jpg
    122.7 KB · Views: 25
  • sharp_4_HighPass.jpg
    sharp_4_HighPass.jpg
    134.8 KB · Views: 30
  • sharp_3_SmoothSharp.jpg
    sharp_3_SmoothSharp.jpg
    146.2 KB · Views: 26
  • sharp_2_RGSharp2steps.jpg
    sharp_2_RGSharp2steps.jpg
    149.7 KB · Views: 22
  • sharp_1_LAB.jpg
    sharp_1_LAB.jpg
    154.3 KB · Views: 29
Last edited:
I wish I could contribute to this discussion but I'm almost completely ignorant of these post-processing programs. I have CS4 (or maybe its 5, I don't remember) and also Adobe Elments 6, but when I've tried to use the latter I've generally ended up a bit frustrated so I don't use either. However, I am really impressed with all the PP knowledge and skill on display here on RPF.
 
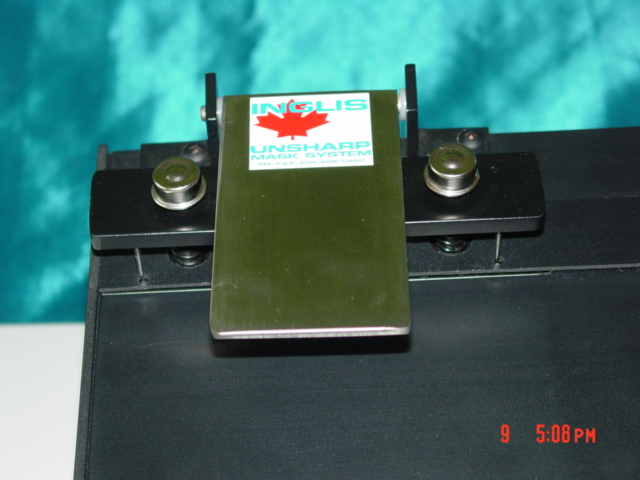
Here you go Brian so you don't feel left out! ;) The original un-sharp mask! :)

Unsharp Masking in the darkroom

punch-lever.jpg
 
Very interesting read! I only have LR atm so any sharpening is done in the detail panel in develop & then just standard sharpening on export to Jpeg. I may well pick up a copy of Elements in the near future, but CS5/6 looks a tad expensive atm.
 
I do not like to use sharpening in LR, because you sharp the whole image (of course, I know, that I can use Adjustment Brush). If we sharp image in Develop Module in Details Area, it's very useful to hold alt-key while dragging sliders Amount, Radius, Detail and Masking. This will show you, where and how sharpening can be applied. At the attached picture you can see that alt key is holding on Masking slider. The lower value is chosen, the more details will be sharped.

But as I already told I prefer to sharpen image in Photoshop. As I work generally with people, I can sharp the image on the duplicated layer and then apply mask and reveal sharpness only in desired areas. Or simply use Eraser Tool and erase in desired area.
trick.jpg
 
i don't use sharpen as such but i do use the definition tool in Aperture which , well brings out the definition lol, as for converting to jpeg in aperture i just press export version and it allows me to export as pretty much any file type and size I want
 
I'm with you on this one Brian. I have heard about sharpening the luminance, but as far as I'm concerned it may as well be in Chinese. Can I ask another silly question? It's to do with mid tone or tonal contrast. I normally use 10% clarity in RAW, which I always believed to be mid tone contrast. Then depending on the subject I may use tonal contrast in Color Efex. A cat will have a control point, but not the rest of the image. A landscape will have it on rocks or grass in the foreground, but I will actually apply negative tonal contrast in the distance (and up to -50% at that).

Now... if sharpening only increases the contrast between edges, then does tonal or mid tone contrast have any effect? For me it increases detail in areas which can then be sharpened at the end. I can't get my head around the logic...
 
Back
Top