Shells

Tim Pindar

Well-Known Member
I spent some time this afternoon trying out a B+W still life of shells, using the techniques set out in this month's Digital SLR Photography magazine.

Here is my end result, what do you think? :

IMG_4422.jpg
 
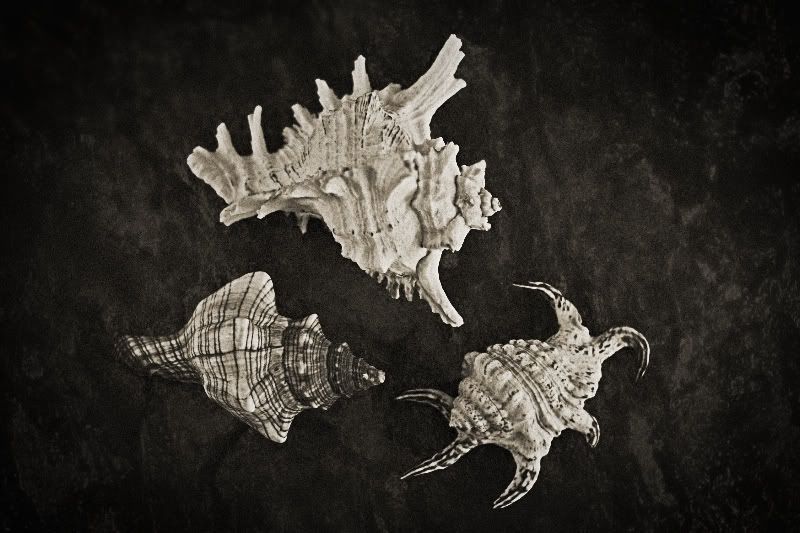
Short answer: pages 92-3 of the magazine, mostly. :)

Longer answer:

- The background is one of our kitchen floor tiles

- Shot taken vertically from above using my 50mm f1.4 lens, at f/2.3

- In Photoshop Elements, I firstly converted to B+W, changing the colour channels to bring out the pattern as much as possible

- Sharpened using a High Pass Filter layer (see http://www.talkphotography.co.uk/forums/showthread.php?t=28733)

- Shadows/Highlights adjusted to bring out the detail

- Using a brush I selected the background, with a large feather setting, and applied some blur

- Brightness and contrast adjustment layer

- I then applied a "burned edges vignette" (see http://www.alibony.com/pse/051408burnedges.html) drawing an elliptical marquee

- Using a Hue/Saturation adjustment layer I added a slight hint of orange brown

- I lastly added a little Noise.

Simple!

Actually, many of those techniques were new to me, but I've used High Pass sharpening before, it seems to work better than the Sharpen tool. I found the link for the vignetting via the Help in PSE.
 
Last edited:
Very nice, love the feel that it gives the photo, some very film like qualities.

Will take a look at the sharpening method, sounds interesting.

You've been persevering with the 50mm then! :)
 
Link to high pass filter method requires a login :(

Any chance of a quick cut and paste?
 
The linked-to article has screenshots etc but here is the text.


I've cobbled together this quick tutorial for high pass sharpening, a method I now use all the time having stumbled across it some months ago. The difference I notice is that it introduces little or no noise to the image unlike USM. If you have a noisy picture to start with I have found that by applying this method, then Noise Reduction (I use Neat Image) and again applying the High Pass sharpening it gives pretty good results although obviously you will have to experiment for yourselves.

1. Open your image as normal, this one was picked at random from a recent show and has just been converted from the RAW file. Hit Control and J to give you a duplicate layer.

2. Go to Filter > Other > High Pass and the image will go grey, don't worry this is normal! Set the pixel slider at 10, this appears to give the best and most consistent results for me and I never bother to deviate from it.

3. On the Layers Palette click on Blending Modes (the small box just above the top layer, it should say Normal) and select Hard Light. You can select Soft Light or any other one that you wish but as before this works for me.

4. You will now notice that the image looks very sharp so it now time to reduce that a bit, go to the Opacity tab and make your reduction as necessary, anything from 20-70% is recommended. I've set up an action recording this and at this stage I entered 35% as it was usually about the right amount. If after using the action I need to change it, for example to sharpen even more, I go to the History tab and select Master Opacity Change.

5. Finally, flatten the image and you're done!
 
Back
Top